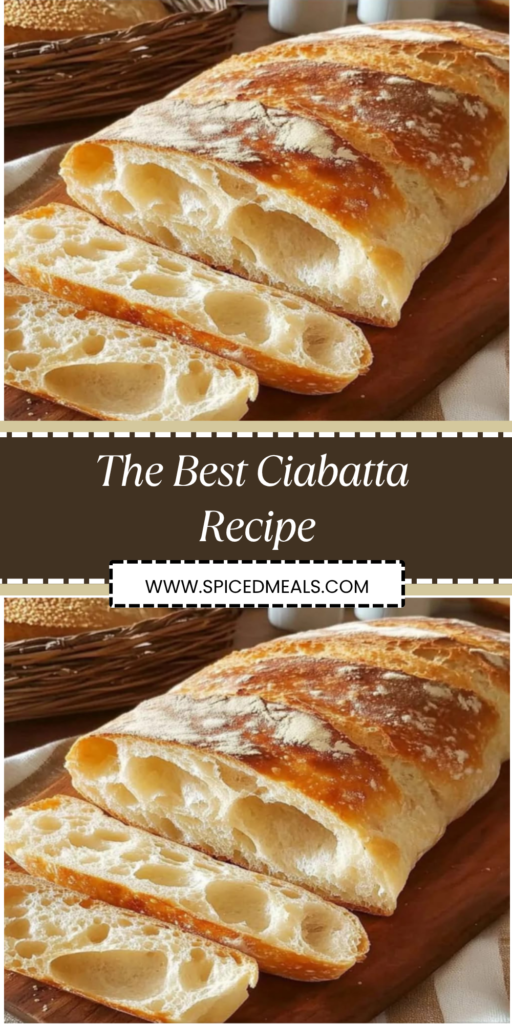
The Best Ciabatta Recipe: Rustic Italian Perfection at Home
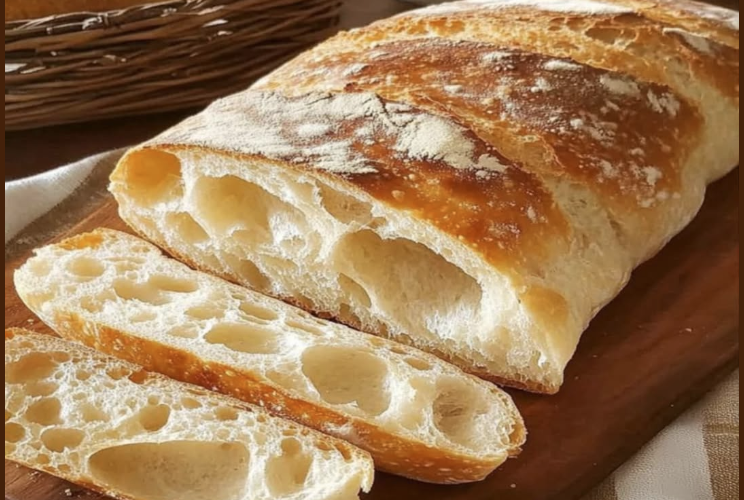
This authentic ciabatta recipe delivers the hallmark characteristics that make this Italian bread so beloved—a crispy, golden crust that shatters to reveal an incredibly airy interior filled with irregular holes perfect for soaking up olive oil or holding sandwich fillings. What sets great ciabatta apart from ordinary bread is its high hydration dough and gentle handling techniques that preserve the open crumb structure while developing the complex flavors that come from proper fermentation. The result is a rustic, artisanal loaf that rivals anything from the finest Italian bakeries, proving that with the right technique and a little patience, you can create bakery-quality bread in your own kitchen.
Ingredients
For the Ciabatta Dough:
- 4 cups all-purpose flour (500g), plus extra for dusting
- 1½ teaspoons instant yeast (5g)
- 1¾ cups warm water (410ml), about 70-75°F
- 2 teaspoons salt (10g)
- 3 tablespoons extra virgin olive oil (45ml), plus extra for drizzling
- 1 teaspoon sugar (optional, for enhanced fermentation)
For Finishing:
- Extra virgin olive oil for drizzling
- Coarse sea salt or flaky salt for sprinkling
- Fresh rosemary sprigs (optional)
- Semolina flour or cornmeal for dusting
Instructions
Step 1: Create the Foundation
In a large mixing bowl, whisk together the all-purpose flour and salt until evenly distributed. This ensures the salt is properly incorporated throughout the dough without creating concentrated areas that could inhibit yeast activity.
In a separate bowl or large measuring cup, dissolve the instant yeast in warm water, stirring gently to combine. The water should feel slightly warm to the touch—too hot will kill the yeast, while too cold will slow fermentation significantly.
Add the sugar if using, which provides extra food for the yeast and can help develop better flavor and color in the finished bread. Let this mixture sit for 2-3 minutes until it becomes slightly foamy, indicating active yeast.
Step 2: Form the Initial Dough
Create a well in the center of the flour mixture and pour in the yeast-water combination along with the olive oil. Using a wooden spoon or your hands, gradually incorporate the flour into the liquid, working from the center outward.
Mix until a shaggy, rough dough forms—it will look quite messy and uneven at this stage, which is completely normal for ciabatta dough. The high hydration makes it much wetter than typical bread doughs.
Don’t add extra flour if the dough seems sticky—ciabatta’s characteristic open crumb comes from this high moisture content, and adding flour will compromise the final texture.
Step 3: Develop Through Kneading
Turn the dough onto a lightly floured surface and begin kneading with a gentle but firm motion. The dough will be quite sticky initially, so dust your hands and the surface lightly with flour as needed.
Knead for 8-10 minutes until the dough becomes smooth and elastic, developing a slight sheen. The dough should pass the windowpane test—you should be able to stretch a small piece thin enough to see light through without tearing.
Use a bench scraper to help handle the sticky dough during kneading, and resist the urge to add too much flour. The stickiness is what creates the beautiful open crumb structure.
Step 4: First Rise and Fermentation
Shape the dough into a ball and place it in a large bowl that has been lightly greased with olive oil. Turn the dough to coat all surfaces with oil, which prevents a skin from forming during rising.
Cover the bowl tightly with plastic wrap or a damp kitchen towel and let rise in a warm, draft-free place for 60-90 minutes, until doubled in size. The dough should feel light and airy when gently poked.
For enhanced flavor development, consider a slower rise in the refrigerator for 8-24 hours after the initial room temperature rise. This extended fermentation develops complex flavors reminiscent of sourdough.
Step 5: Shape with Gentle Handling
Once doubled, turn the dough onto a lightly floured surface. Handle it very gently to preserve the gas bubbles that create ciabatta’s characteristic holes—punching down aggressively will destroy the open crumb.
Divide the dough into two equal portions using a bench scraper or sharp knife. Shape each portion into an oval loaf by gently stretching and folding, rather than traditional kneading motions.
The loaves should be roughly 8-10 inches long and 4-5 inches wide, with a rustic, slightly irregular shape that’s characteristic of authentic ciabatta.
Step 6: Final Proofing
Transfer the shaped loaves to a parchment-lined baking sheet, leaving at least 4 inches between them to allow for expansion during the final rise and baking.
Cover loosely with oiled plastic wrap or a damp towel and let rise for 30-45 minutes until noticeably puffed but not quite doubled. The dough should spring back slowly when gently poked with a finger.
During the last 15 minutes of proofing, preheat your oven to 425°F (220°C) and place a shallow pan on the bottom rack—this will be used to create steam for a crispy crust.
Step 7: Create Steam and Bake
Just before baking, remove the covering from the loaves and drizzle them generously with extra virgin olive oil. Sprinkle coarse sea salt over the surface, and add fresh rosemary sprigs if desired.
Place the baking sheet in the preheated oven and immediately pour 1 cup of hot water into the pan on the bottom rack to create steam. Close the oven door quickly to trap the steam.
Bake for 20-25 minutes until the loaves are deep golden brown and sound hollow when tapped on the bottom. The internal temperature should reach 200-205°F when measured with an instant-read thermometer.
Step 8: Cool for Optimal Texture
Remove the finished loaves from the oven and transfer to a wire cooling rack immediately. Resist the temptation to cut into them while hot—the interior continues cooking and setting during the cooling process.
Allow the ciabatta to cool for at least 30 minutes before slicing. This cooling period is crucial for developing the proper texture and preventing gummy interiors.
The bread is best enjoyed within 24 hours of baking, though it can be refreshed in a 350°F oven for 5-10 minutes if it loses crispness.
Prep Time: 30 minutes | Rise Time: 2-3 hours | Bake Time: 25 minutes | Total Time: 3-4 hours | Servings: 2 loaves (12-16 slices) | Calories: 145 per slice
Understanding Ciabatta’s Unique Characteristics
Ciabatta, which means “slipper” in Italian, gets its name from its characteristic flat, elongated shape. What distinguishes it from other breads is its extremely high hydration—often 75-80% water to flour ratio—which creates the signature open, irregular crumb structure.
The bread originated in the Veneto region of Italy in the 1980s as a response to the popularity of French baguettes. Italian bakers wanted to create something uniquely Italian that could compete with the beloved French bread.
The key to authentic ciabatta lies in minimal handling and proper fermentation, which develops the complex flavors and creates the gas bubbles that form the characteristic holes throughout the crumb.
The Science of High-Hydration Doughs
Working with high-hydration doughs requires different techniques than standard bread making. The excess moisture creates a sticky, difficult-to-handle dough that develops gluten differently than lower-hydration varieties.
The stickiness isn’t a flaw to be corrected—it’s essential for creating the open crumb structure. The water creates steam during baking, which inflates the gluten network and creates the large, irregular holes.
Proper gluten development comes from gentle stretching and folding rather than aggressive kneading, which preserves the gas bubbles while still building the structure needed for good bread.
Mastering the Fermentation Process
Fermentation time directly impacts flavor development in ciabatta. The longer, slower fermentation allows enzymes to break down starches into sugars, which feed the yeast and create complex flavors.
Temperature control during fermentation is crucial—too warm and the dough develops too quickly without proper flavor; too cool and fermentation stalls, preventing proper rise and texture development.
The dough should roughly double in size during the first rise, but the timing can vary significantly based on temperature, humidity, and yeast activity. Learning to read the dough is more important than watching the clock.
Professional Shaping Techniques
Shaping ciabatta requires a light touch and confidence. The goal is to maintain as much of the gas structure as possible while creating loaves that will hold their shape during baking.
Use a bench scraper to help handle the sticky dough, and work quickly but gently. The rustic, slightly irregular shape is part of ciabatta’s charm—perfectly uniform loaves often indicate overhandling.
If the dough tears during shaping, simply press the torn edges together gently. These imperfections often disappear during the final rise and baking process.
Steam and Crust Development
The initial burst of steam in the oven is crucial for developing ciabatta’s characteristic crispy crust. Steam keeps the surface moist during the first part of baking, allowing maximum expansion before the crust sets.
The steam also contributes to the glossy, golden-brown finish that makes ciabatta so visually appealing. Without adequate steam, the crust will be pale and may crack unevenly.
Alternative steam methods include spraying the oven walls with water, placing ice cubes in a hot pan, or using a spray bottle to mist the loaves just before closing the oven door.
Troubleshooting Common Issues
Dense, Heavy Bread: Usually indicates insufficient fermentation, overhandling during shaping, or inadequate gluten development. Ensure proper rise times and gentle handling throughout.
Flat Loaves: Often caused by overproofed dough or insufficient gluten development. The dough should spring back slowly when poked during the final proof.
Gummy Interior: Typically results from cutting the bread too soon after baking. Always allow proper cooling time for the interior to set completely.
Pale Crust: Usually indicates insufficient steam or oven temperature. Ensure proper preheating and steam generation for optimal crust development.
Flavor Variations and Enhancements
While classic ciabatta is perfect on its own, variations can create interesting flavor profiles. Herb-infused versions incorporate fresh rosemary, thyme, or oregano into the dough during mixing.
Olive ciabatta adds chopped Kalamata or green olives for Mediterranean flair, while sun-dried tomato versions provide intense, concentrated flavor throughout the bread.
For enhanced depth, consider using a preferment—a small portion of flour, water, and yeast mixed 12-24 hours ahead and added to the main dough for improved flavor and texture.
Storage and Serving Suggestions
Fresh ciabatta is best enjoyed within 24 hours of baking when the crust is at its crispiest and the interior texture is optimal. Store at room temperature wrapped in paper, not plastic, which can soften the crust.
Day-old ciabatta makes excellent toast, bruschetta, or panini. The sturdy crust and open crumb structure hold up well to grilling and provide excellent texture contrast.
For longer storage, slice and freeze the bread in portions. Individual slices can be toasted directly from frozen for quick breakfast or snack options.
Equipment Considerations
While ciabatta can be made with basic equipment, a few tools make the process easier and more successful. A digital scale ensures accurate measurements, especially important for high-hydration doughs.
A bench scraper is invaluable for handling sticky dough and dividing portions cleanly. A kitchen thermometer helps monitor water temperature and internal bread temperature for optimal results.
A baking stone or steel can improve crust development by providing intense, even heat from below, though it’s not essential for good results.
Nutritional Benefits and Considerations
Ciabatta provides complex carbohydrates and contains less fat than many enriched breads due to its simple ingredient list. The fermentation process makes nutrients more bioavailable and creates beneficial compounds.
The open crumb structure means ciabatta has slightly fewer calories per volume compared to denser breads, while the high hydration provides more satisfying texture with less actual bread mass.
For those monitoring sodium intake, the salt can be reduced slightly, though this may affect both flavor and gluten development. Start with small reductions and adjust based on results.
Cultural Context and Serving Traditions
In Italy, ciabatta is often served simply—drizzled with good olive oil, sprinkled with salt, and perhaps topped with fresh tomatoes or herbs. This simplicity allows the bread’s flavor and texture to shine.
The bread’s structure makes it ideal for sandwiches, particularly panini where the open crumb compresses nicely while maintaining textural interest. It also excels as a base for bruschetta and other appetizers.
Understanding these traditional uses helps appreciate why certain characteristics—like the open crumb and sturdy crust—are so important to authentic ciabatta’s identity.
Final Thoughts
Mastering ciabatta represents a significant milestone in home bread baking, teaching important lessons about working with high-hydration doughs, understanding fermentation, and developing the confidence to handle challenging techniques. The reward for this effort goes far beyond just having delicious bread—it’s about connecting with centuries of Italian baking tradition while developing skills that apply to countless other artisanal breads.
The beauty of ciabatta lies in its apparent simplicity masking sophisticated technique. Using just five basic ingredients, this bread showcases how proper method and understanding can transform humble materials into something extraordinary. The contrast between the crispy, golden crust and the airy, hole-filled interior creates a sensory experience that elevates any meal, whether it’s a simple lunch sandwich or an elegant dinner party.
Once you master the techniques required for ciabatta—handling sticky doughs, reading fermentation cues, and developing confidence in gentle shaping—you’ll find these skills translate to many other artisanal breads. More importantly, you’ll have created something that brings people together around the table, sharing in the ancient pleasure of breaking bread that connects us to generations of bakers who understood that the best things in life often require patience, skill, and just a touch of magic.