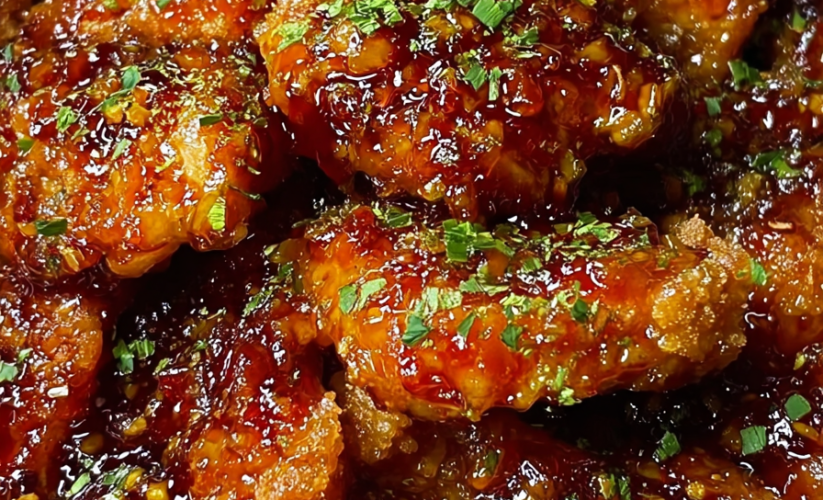
Crispy Honey Garlic Chicken
This Crispy Honey Garlic Chicken transforms tender boneless chicken thighs into golden, crunchy perfection through a seasoned flour coating and baking method, then finishes them with a glossy honey garlic sauce that caramelizes in the oven. The dish delivers the satisfying crunch of fried chicken without deep frying, while the sweet-savory sauce made from honey, soy sauce, and fresh garlic creates addictive flavor that balances perfectly with the crispy coating. Ready in just 45 minutes with straightforward techniques, this Asian-inspired recipe provides restaurant-quality results that bring families to the table for seconds, proving that impressive chicken dinners don’t require complicated methods or hours of preparation.
Why You’ll Love This Recipe
Crispy Without Deep Frying – This recipe achieves genuinely crunchy, golden-brown coating through oven baking rather than deep frying, eliminating the mess, smell, and excess oil while producing results that rival traditional fried chicken.
Sweet and Savory Balance – The honey garlic sauce creates perfect harmony between honey’s floral sweetness and soy sauce’s umami depth, with fresh garlic adding pungent complexity that prevents the dish from tasting one-dimensional.
Weeknight-Friendly Timeline – With just 45 minutes total time including prep and cooking, this delivers special-occasion quality on a regular Tuesday evening without requiring hours in the kitchen.
Juicy Chicken Thighs – Using boneless, skinless chicken thighs instead of breasts ensures the meat stays moist and tender during baking, as thighs’ higher fat content prevents the dryness that often plagues baked chicken breast.
Crowd-Pleasing Appeal – The familiar combination of crispy chicken with sweet-savory sauce appeals universally across ages and taste preferences, making this safe for picky eaters while exciting enough for adventurous diners.
Minimal Active Cooking – While the chicken bakes hands-free in the oven, you prepare the simple sauce, maximizing efficiency and minimizing the overwhelming feeling that comes from juggling multiple stovetop tasks.
Ingredients You’ll Need
For the Crispy Coating
2 pounds chicken thighs, boneless and skinless – Provide juicy, flavorful protein base; thighs remain tender during baking due to higher fat content compared to leaner breasts that often dry out.
1 cup all-purpose flour – Creates the foundation of the crispy coating that adheres to chicken and develops golden-brown crust during baking.
1 teaspoon salt – Seasons the coating from within and helps draw moisture to the surface, which contributes to crispier texture during baking.
1 teaspoon black pepper – Adds aromatic heat and complexity to the coating that enhances the chicken’s savory character.
1 teaspoon garlic powder – Contributes savory, aromatic depth in the coating that reinforces the fresh garlic in the sauce.
1 teaspoon onion powder – Provides subtle sweetness and aromatic complexity that builds flavor layers beyond simple salt and pepper.
½ teaspoon paprika – Adds mild, sweet pepper flavor and contributes to the golden-red color that makes the coating visually appealing.
½ teaspoon baking powder – Creates lighter, crispier coating by producing tiny air bubbles during baking that prevent dense, heavy crust.
For the Egg Wash
2 large eggs – Form the binding agent that helps flour coating adhere to chicken; eggs create sticky surface that flour mixture clings to effectively.
¼ cup milk – Thins the egg mixture slightly for easier coating and contributes to tender, not tough, crust through its moisture and fat content.
For the Honey Garlic Sauce
½ cup honey – Provides the primary sweetness and creates glossy, sticky sauce that caramelizes beautifully during the final baking step.
¼ cup soy sauce – Delivers umami depth, saltiness, and savory complexity that balances honey’s sweetness and creates authentic Asian flavor profile.
3 cloves garlic, minced – Add pungent, aromatic character that defines the sauce; fresh garlic provides superior flavor to jarred or powdered alternatives.
1 tablespoon vegetable oil – Helps emulsify the sauce and adds slight richness while preventing the honey from becoming too thick or sticky.
For Garnishing
1 tablespoon sesame seeds (optional) – Provide nutty flavor, visual interest, and subtle crunch that reinforces Asian flavor profile.
Chopped green onions for garnish (optional) – Add fresh, sharp onion flavor and bright green color that creates visual appeal and freshness.
Step-by-Step Instructions
Preheat and Prepare – Set your oven to 400°F (200°C) and position a rack in the center, then line a large baking sheet with parchment paper to prevent sticking and ensure easy cleanup.
Create the Seasoned Flour Mixture – In a large, shallow bowl, combine the all-purpose flour, salt, black pepper, garlic powder, onion powder, paprika, and baking powder, whisking thoroughly until all seasonings are evenly distributed throughout the flour.
Prepare the Egg Wash – In another shallow bowl or pie plate, whisk together the eggs and milk until completely combined with no streaks of egg white remaining, creating a uniform yellow mixture.
Coat the Chicken Thighs – Working with one chicken thigh at a time, dip it into the egg mixture, turning to coat completely and allowing excess to drip back into the bowl, then transfer to the flour mixture and press gently to coat all surfaces thoroughly, shaking off excess flour before placing on the prepared baking sheet.
Arrange for Even Cooking – Place the coated chicken thighs on the baking sheet in a single layer with at least 1 inch of space between each piece to ensure proper air circulation and even browning on all sides.
Bake Until Golden and Crispy – Place the baking sheet in the preheated oven and bake for 25-30 minutes, checking at the 25-minute mark, until the coating is golden brown, crispy, and the internal temperature reaches 165°F when tested with a meat thermometer.
Prepare the Honey Garlic Sauce – While the chicken bakes, combine the honey, soy sauce, minced garlic, and vegetable oil in a small saucepan over medium heat, stirring to combine, then bring to a gentle simmer and cook for about 5 minutes while stirring occasionally until the sauce thickens slightly and the garlic becomes fragrant.
Apply the Sauce – Once the chicken reaches the initial baking time, carefully remove the baking sheet from the oven and use a spoon or pastry brush to drizzle or brush the honey garlic sauce generously over each piece of chicken, then sprinkle with sesame seeds if using.
Caramelize the Sauce – Return the sauced chicken to the oven and bake for an additional 5-10 minutes, watching carefully during the final minutes, until the sauce caramelizes and becomes glossy and sticky but not burnt.
Rest and Garnish – Remove the chicken from the oven and let it rest on the baking sheet for 3-5 minutes to allow the coating to set and juices to redistribute, then transfer to a serving platter and garnish with chopped green onions before serving immediately while hot and crispy.
Recipe Notes & Tips
Baking Powder Creates Crispiness – The small amount of baking powder in the flour mixture is crucial for achieving crispy coating; it creates air pockets during baking that result in lighter, crunchier texture.
Don’t Overcrowd the Pan – Leaving space between chicken pieces allows hot air to circulate completely, ensuring even cooking and preventing steaming that would create soggy coating instead of crispy.
Pat Chicken Dry First – Before coating, pat chicken thighs dry with paper towels to remove excess moisture that would prevent the coating from adhering properly and create soggy rather than crispy results.
Double Coating for Extra Crunch – For even crispier coating, dip coated chicken back into egg wash and flour mixture a second time before baking, creating thicker, more substantial crust.
Monitor Sauce Carefully – Honey burns quickly once it caramelizes; watch the chicken closely during the final 5-10 minutes to catch the perfect moment when sauce becomes glossy and sticky but hasn’t burned.
Chicken Thighs Stay Juicier – While the recipe notes mention substituting chicken breasts, thighs’ higher fat content and darker meat ensure juiciness even if slightly overcooked, making them more forgiving.
Nutritional Information
Prep Time: 15 minutes
Cook Time: 30 minutes
Total Time: 45 minutes
Servings: 4 servings
Calories: 450 calories per serving
Protein: 30g | Carbohydrates: 30g | Fat: 20g
Saturated Fat: 3g | Sugar: 30g | Sodium: 800mg
Fiber: 1g | Cholesterol: 150mg
Perfect Pairings
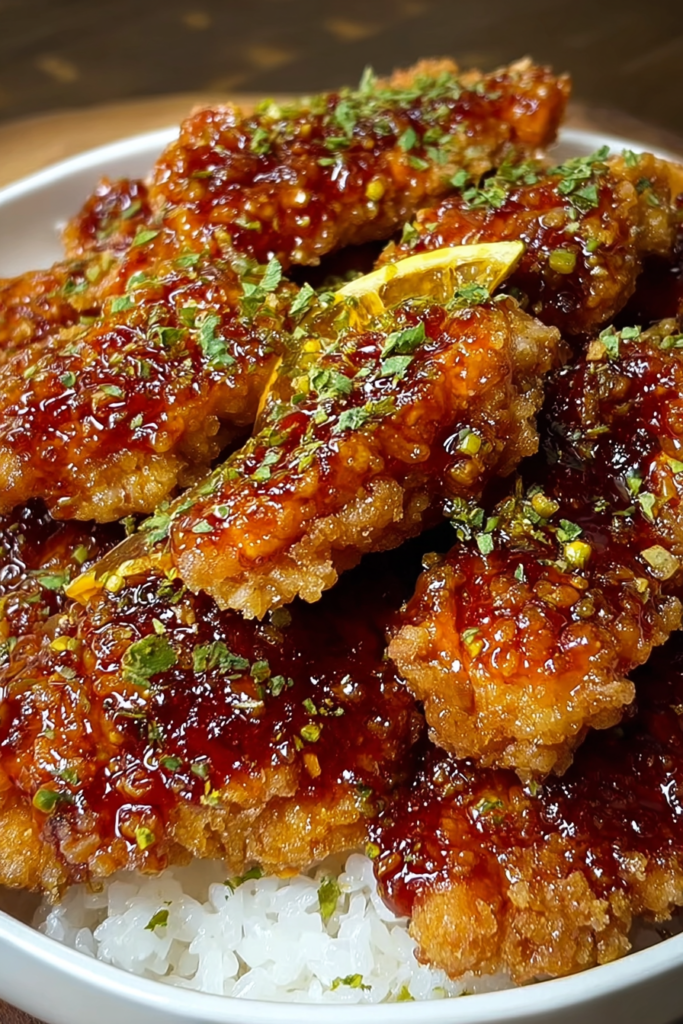
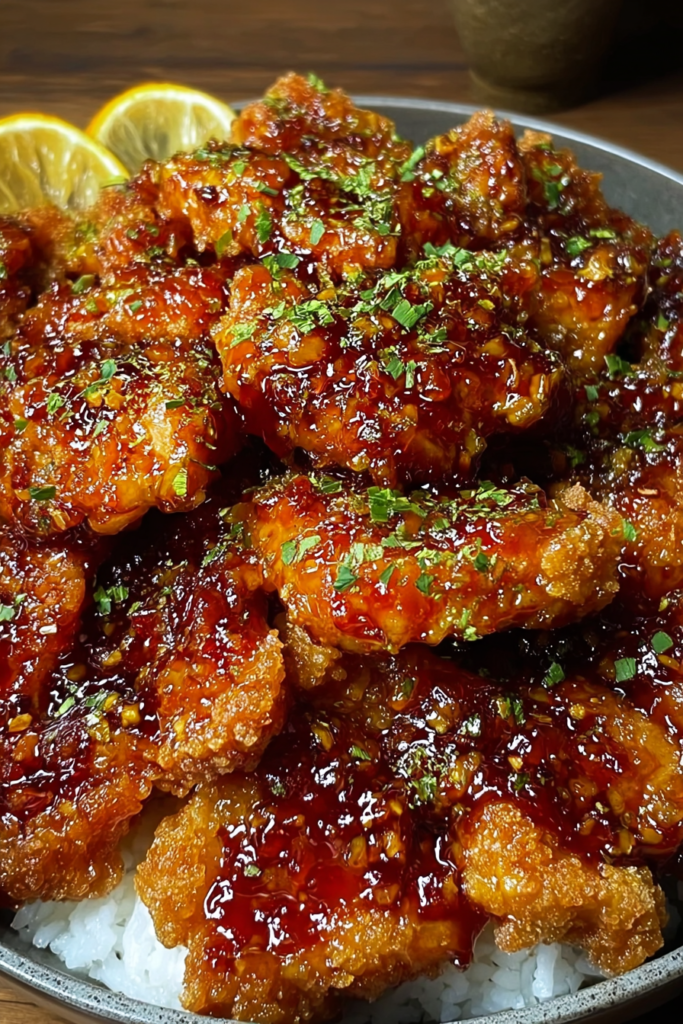
Steamed White or Fried Rice – Serve alongside fluffy rice that soaks up the extra honey garlic sauce and provides neutral base that balances the chicken’s bold flavors.
Asian-Style Vegetables – Stir-fried or steamed broccoli, snap peas, bok choy, or mixed vegetables seasoned with soy sauce and sesame oil complement the chicken’s flavor profile perfectly.
Simple Cucumber Salad – A refreshing salad of sliced cucumbers dressed with rice vinegar, sesame oil, and a touch of sugar provides cool, crisp contrast to the warm, sticky chicken.
Noodles or Lo Mein – Serve over or alongside Asian noodles tossed with vegetables for a complete meal that captures takeout experience at home.
Ideal Occasions
Busy Weeknight Dinners – The 45-minute timeline and straightforward preparation make this perfect for evenings when you want something special without spending hours cooking.
Family Dinner Favorites – The kid-friendly sweet-savory flavor and crispy texture appeal to children while adults appreciate the sophisticated honey garlic sauce.
Casual Entertaining – Impress dinner guests with restaurant-quality results that look and taste complicated but require only basic cooking skills and common ingredients.
Meal Prep for the Week – This chicken reheats well and can be prepared on Sunday for portioning into weekday lunches alongside rice and vegetables.
Storage & Serving Tips
Refrigerator Storage – Store leftover chicken in an airtight container in the refrigerator for up to 3 days; the coating will soften slightly but remains delicious.
Reheating for Crispiness – Restore crispness by reheating in a 375°F oven for 8-10 minutes or in an air fryer at 350°F for 5-7 minutes; avoid microwaving which makes coating soggy.
Freezer-Friendly – Freeze cooled, cooked chicken in airtight containers or freezer bags for up to 2 months; thaw overnight in refrigerator before reheating.
Sauce Separation – Store any extra honey garlic sauce separately in a sealed container in the refrigerator for up to 1 week; reheat gently before drizzling over reheated chicken.
Creative Variations to Try
Extra Crunchy Version – Mix ½ cup panko breadcrumbs into the flour mixture for even more texture and crispiness that rivals deep-fried chicken.
Spicy Honey Garlic – Add 1-2 teaspoons of sriracha or gochujang to the honey garlic sauce for spicy-sweet Korean-inspired flavor that adds complexity.
Lemon Honey Garlic – Add 1 tablespoon of fresh lemon juice to the sauce for bright acidity that cuts through richness and adds freshness.
Ginger-Enhanced – Include 1 teaspoon of fresh grated ginger in the honey garlic sauce for aromatic complexity that creates more authentic Asian flavor profile.
Chicken Breast Alternative – Substitute boneless, skinless chicken breasts pounded to even thickness; reduce initial baking time to 20-25 minutes to prevent drying.
Gluten-Free Version – Use gluten-free all-purpose flour blend and tamari instead of soy sauce to accommodate gluten sensitivities without sacrificing flavor.
Troubleshooting Common Issues
Coating Falls Off During Baking – This happens when chicken isn’t properly dried before coating or when coating doesn’t adhere well; pat chicken completely dry and press flour mixture firmly into the egg-coated surface.
Chicken is Dry – Overbaking or using chicken breasts causes dryness; stick to recommended 25-30 minutes for thighs, verify with meat thermometer at 165°F, and consider using thighs instead of breasts.
Coating Isn’t Crispy – Insufficient oven temperature, overcrowded pan, or missing baking powder causes soft coating; ensure proper 400°F temperature, space chicken pieces adequately, and include baking powder.
Sauce Burns During Final Baking – Honey burns quickly once caramelized; watch carefully during final 5-10 minutes and reduce oven temperature to 375°F if sauce darkens too quickly.
Why This Recipe Works
This Crispy Honey Garlic Chicken succeeds by applying proper coating technique and controlled baking to achieve crispy texture without deep frying, while the honey garlic sauce adds flavor complexity that elevates simple chicken beyond basic. The flour mixture seasoned with multiple spices creates flavorful coating rather than bland breading, while the baking powder’s leavening action produces air pockets that result in lighter, crispier texture. The egg-milk wash creates sticky surface that holds flour mixture firmly, preventing it from falling off during baking. Baking at 400°F is hot enough to crisp the coating through the Maillard reaction while cooking chicken through without drying it out, and the parchment paper prevents sticking while allowing bottom to crisp. The honey garlic sauce combines sweet, salty, and savory elements in perfect proportion, with fresh garlic providing pungent complexity that dried garlic couldn’t match. Applying sauce after initial baking and returning to the oven allows it to caramelize and develop deeper flavor while creating glossy, sticky coating that clings to the crispy chicken. Using chicken thighs ensures juiciness even if slightly overcooked, as their higher fat content and connective tissue prevent the dryness that often plagues baked chicken breast. At 450 calories per serving with 30g of protein, this provides substantial nutrition including complete protein, while the baking method reduces fat compared to deep-fried alternatives.
Final Thoughts
This Crispy Honey Garlic Chicken proves that achieving restaurant-quality crispy chicken at home doesn’t require deep fryers, special equipment, or professional training—just proper coating technique, the right oven temperature, and a perfectly balanced sauce. By baking instead of frying, you create lighter results with significantly less mess and fewer calories while still delivering the satisfying crunch that makes fried chicken so beloved. While this is certainly a flavorful, moderately indulgent dish, the baking method and use of lean chicken thighs makes it more reasonable than traditional fried options, and serving it alongside vegetables and rice creates a balanced meal. The recipe’s flexibility allows adjustments to spice level, coating thickness, or protein choice based on personal preferences or dietary needs, making it a valuable template you’ll return to repeatedly. Whether you’re feeding your family on a busy Tuesday, impressing dinner guests with minimal effort, meal prepping for the week, or simply craving the addictive combination of crispy chicken and sticky-sweet sauce, this golden, crunchy, honey-glazed chicken delivers satisfaction, flavor, and crowd-pleasing appeal in every perfectly seasoned, caramelized, sesame-sprinkled bite.