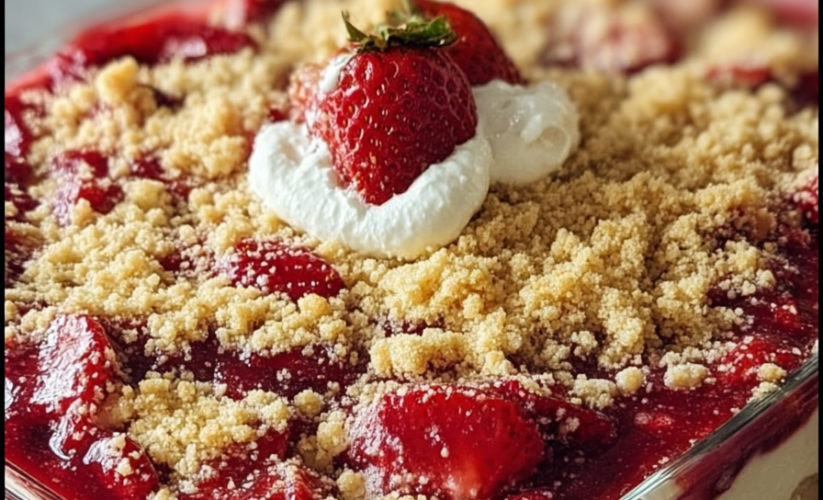
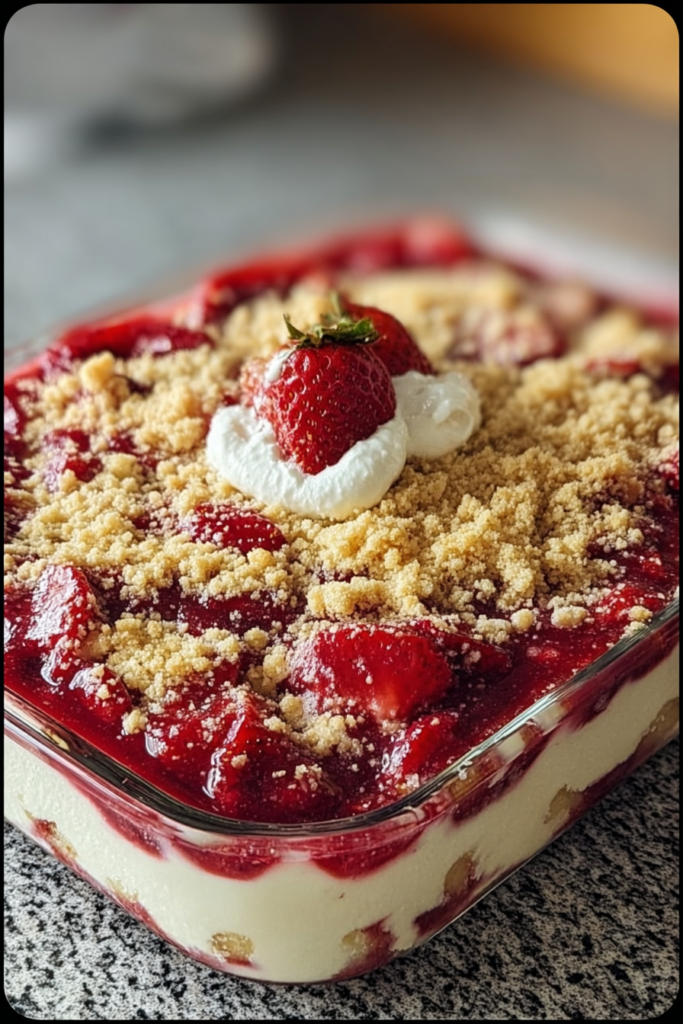
Strawberry Cheesecake Dump Cake
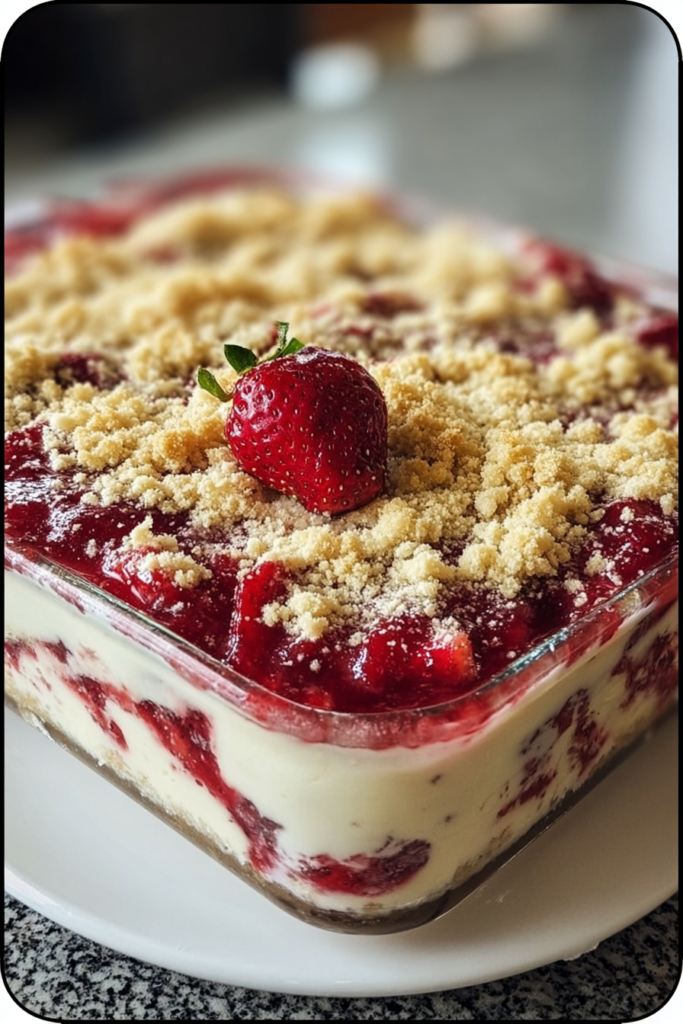
This Strawberry Cheesecake Dump Cake layers canned strawberry pie filling with a creamy cheesecake mixture, then tops everything with dry cake mix and butter slices that transform into a golden, crispy crust during baking—all without mixing a single batter from scratch. The dessert earns its “dump” name from the simple layering technique that requires minimal skill or equipment, yet produces bakery-worthy results featuring sweet strawberries, luscious cream cheese pockets, and warm cake topping. Perfect for busy families, last-minute gatherings, or satisfying sweet cravings without complicated steps, this crowd-pleasing dessert proves that maximum flavor doesn’t require maximum effort, delivering comfort and indulgence in every spoonful.
Why You’ll Love This Recipe
Effortless Elegance – Despite the casual “dump” name implying rustic simplicity, this dessert produces impressive, beautiful results that look bakery-made with minimal technique or skill required.
No Mixer Needed – Beyond beating the cream cheese layer which takes minutes, this recipe requires no complicated mixing, electric mixers for batter, or measuring multiple dry ingredients.
Minimal Cleanup – Using a single baking dish and requiring almost no prep work means cleanup takes minutes rather than filling your sink with multiple bowls, measuring cups, and mixers.
Guaranteed Success – The foolproof technique ensures even novice bakers achieve perfect results every time, making this ideal for those intimidated by traditional baking or prone to recipe failures.
Make-Ahead Friendly – You can assemble the base layers ahead and refrigerate, adding the cake mix and butter just before baking for maximum convenience when entertaining.
Crowd-Pleasing Versatility – This dessert works equally well for casual family dinners, holiday celebrations, potlucks, or special occasions, adapting to both formal and informal settings seamlessly.
Ingredients You’ll Need
For the Fruit and Cheesecake Layer
2 cans (15 oz each) strawberry pie filling – Provide the sweet, fruity base layer; the canned filling offers convenience with consistent texture and sweetness while creating beautiful ruby-red color.
8 oz full-fat cream cheese, softened to room temperature – Creates the creamy, tangy cheesecake layer that adds richness and transforms this from simple dump cake to something more sophisticated.
1 large egg, room temperature – Binds the cream cheese mixture and helps it set properly during baking, creating stable cheesecake pockets throughout.
¼ cup granulated sugar – Sweetens the cheesecake layer and balances the tangy cream cheese while complementing the sweet strawberry filling.
For the Cake Topping
1 box (15-16 oz) white, yellow, or vanilla cake mix – Forms the golden, crispy topping when combined with butter; white cake creates brightest contrast, yellow adds richness, and vanilla offers balanced flavor.
½ cup cold unsalted butter, thinly sliced – Melts into the dry cake mix during baking, transforming it into golden, crispy crust with rich, buttery flavor throughout.
For Optional Garnishes
Fresh sliced strawberries – Add brightness, color, and fresh fruit element that reinforces the strawberry theme.
Whipped cream – Provides light, airy topping that balances the rich dessert.
Vanilla ice cream – Creates classic à la mode experience with cold creaminess melting into warm cake.
Powdered sugar – Adds simple finishing touch that creates bakery-worthy appearance.
White chocolate shavings – Contribute elegance and additional sweetness for special occasions.
Step-by-Step Instructions
Preheat Oven and Prepare Dish – Set your oven to 350°F (175°C) and position a rack in the center, then lightly grease a 9×13-inch baking dish with butter or cooking spray; glass or ceramic dishes work best for even heat distribution.
Create Strawberry Base – Pour both cans of strawberry pie filling into the prepared baking dish and use a spatula to spread it into a smooth, even layer across the entire bottom, ensuring complete coverage with no bare spots.
Prepare Cheesecake Mixture – In a medium mixing bowl, combine the softened cream cheese, egg, and granulated sugar, then beat with an electric mixer on medium speed for 2-3 minutes until completely smooth, creamy, and free of any lumps.
Add Cheesecake Layer – Drop spoonfuls of the cream cheese mixture evenly over the strawberry layer, distributing it across the surface, then use a spoon or offset spatula to gently spread it without disturbing the fruit layer too much beneath.
Sprinkle Cake Mix – Open the box of dry cake mix and sprinkle it evenly over the cream cheese layer, covering the entire surface completely to create a uniform blanket; do not stir or mix—the dryness is intentional.
Distribute Butter Slices – Thinly slice the cold butter and arrange the pieces evenly across the top of the dry cake mix, covering as much surface area as possible to ensure the cake mix moistens evenly and browns uniformly.
Bake Until Golden – Place the baking dish in the preheated oven and bake for 40-45 minutes, checking at 40 minutes, until the top is deeply golden brown and the strawberry filling is bubbling vigorously around the edges.
Cool Before Serving – Remove the cake from the oven and let it rest on a cooling rack for at least 15 minutes, which allows the cheesecake layer to set properly and makes serving cleaner and easier.
Serve Warm or Chilled – Scoop portions into bowls while warm for a melty, comforting dessert, or refrigerate completely and slice into neat squares for more structured presentation with your choice of garnishes.
Recipe Notes & Tips
Room-Temperature Ingredients Matter – Softened cream cheese and room-temperature egg blend smoothly without lumps; cold ingredients create grainy texture that won’t incorporate properly.
Use Cold Butter – Cold butter slices melt slowly and evenly during baking, creating uniform golden crust; melted butter would soak in too quickly and create uneven coverage.
Don’t Stir the Layers – The layering technique is essential; stirring defeats the purpose of a dump cake and prevents the distinct layers that create this dessert’s signature texture.
Let It Rest – Cutting too soon causes the layers to spill and blend; the resting period allows everything to set and hold shape for cleaner portions.
Choose Your Cake Mix – White cake mix creates brightest visual contrast, yellow adds richer flavor, and vanilla offers balanced middle ground; all work beautifully.
Check for Doneness – The center may appear slightly soft when removed; this is normal and it will firm up as it cools, so don’t overbake trying to achieve firmness immediately.
Nutritional Information
Prep Time: 15 minutes
Baking Time: 40-45 minutes
Cooling Time: 15 minutes minimum
Total Time: Approximately 70 minutes
Servings: 12 servings
Calories: Approximately 380 calories per serving
Fat: 17g | Carbohydrates: 52g | Protein: 4g
Sugar: 35g | Fiber: 1g
Perfect Pairings
Vanilla Ice Cream – Serve warm cake with cold vanilla ice cream that melts into the strawberries, creating classic à la mode experience.
Fresh Whipped Cream – Add a dollop of freshly whipped cream for lightness that balances the rich cake and provides visual appeal.
Hot Coffee or Tea – Pair with freshly brewed coffee or tea whose slight bitterness balances the sweet dessert and creates satisfying after-dinner experience.
Fresh Berries – Garnish with additional fresh strawberries or mixed berries for brightness and fresh fruit element that reinforces the berry theme.
Ideal Occasions
Potluck Contributions – The 9×13 format travels perfectly and serves a crowd, making this ideal for church potlucks, office parties, or neighborhood gatherings.
Holiday Celebrations – The festive appearance and crowd-pleasing flavor make this appropriate for Christmas, Valentine’s Day, Fourth of July, or any celebration.
Last-Minute Gatherings – When unexpected guests arrive or you need dessert quickly, this comes together in minutes and bakes while you visit.
Busy Weeknight Treats – Make weeknight dinners feel special by adding this easy dessert that requires minimal effort but delivers maximum comfort.
Storage & Serving Tips
Refrigerator Storage Required – The cream cheese layer requires refrigeration; store covered in the baking dish or transfer to airtight containers for up to 4-5 days.
Freezer-Friendly – Wrap tightly and freeze for up to 2 months; thaw overnight in refrigerator and warm gently before serving to refresh the topping.
Reheating Instructions – Warm individual portions in the microwave for 30-45 seconds or reheat the entire dish covered with foil at 300°F for 15-20 minutes.
Serve Warm or Cold – This dessert tastes delicious both ways—warm creates melty, comforting experience while chilled produces cleaner slices with more structure.
Creative Variations to Try
Cheesecake Swirl – Instead of spreading the cream cheese smoothly, swirl it with a knife into the strawberry layer for marbled appearance.
Fresh Berry Addition – Scatter fresh blueberries or sliced strawberries over the pie filling before adding other layers for enhanced fruit flavor and texture.
Chocolate Version – Use chocolate cake mix and drizzle finished cake with hot fudge, or sprinkle mini chocolate chips before baking for chocolate-covered strawberry experience.
Lemon Brightening – Add 1 teaspoon lemon zest to the cheesecake layer for citrus brightness that enhances strawberry flavor and cuts through richness.
Gluten-Free Option – Substitute certified gluten-free cake mix and verify pie filling is gluten-free for those with celiac disease or gluten sensitivity.
Mixed Berry – Use cherry, blueberry, or mixed berry pie filling instead of strawberry for seasonal variations throughout the year.
Troubleshooting Common Issues
Dry Patches on Top – If some cake mix didn’t moisten properly, brush with melted butter immediately after removing from oven to fix dry spots.
Cheesecake Layer Too Runny – If filling seems loose when served, refrigerate for at least 1 hour to firm up the cream cheese layer for better structure.
Burnt Edges – Oven hot spots cause uneven browning; rotate the dish halfway through baking and consider reducing temperature to 325°F if your oven runs hot.
Filling Bubbles Over – Overfilling the dish or too-high oven temperature causes overflow; use a 9×13 dish and verify accurate oven temperature with a thermometer.
Why This Recipe Works
This Strawberry Cheesecake Dump Cake succeeds by leveraging convenient ingredients in a clever layering technique that creates distinct textures and flavors without requiring traditional baking skills. The strawberry pie filling provides consistent sweetness and texture while eliminating the need to prepare fresh fruit or make filling from scratch. The cream cheese layer adds sophistication beyond standard dump cakes, creating pockets of tangy richness that melt into the strawberries during baking. The dry cake mix acts as both topping and thickener—as butter melts and seeps through, it activates the cake mix’s ingredients, creating a golden, crispy crust with tender cake beneath. The cold butter ensures gradual melting that allows even distribution rather than all sinking to one area. Baking at 350°F provides enough heat to activate the cake mix, melt the butter, and set the cream cheese while allowing the strawberry filling to bubble and caramelize around the edges. The resting period allows the cream cheese to firm up from its melted state and gives the cake topping time to set properly. At approximately 380 calories per serving, this provides indulgent dessert with the presence of real fruit offering some nutritional value alongside the treat aspects.
Final Thoughts
This Strawberry Cheesecake Dump Cake proves that impressive, bakery-worthy desserts don’t require professional skills, complicated techniques, or hours of labor—just smart layering of quality convenience ingredients that work together beautifully. The recipe honors the dump cake tradition of minimal effort and maximum results while elevating it through the cream cheese addition that creates gourmet character. While this is certainly a sweet indulgence appropriate for special occasions rather than everyday eating, the ease of preparation means you can create something impressive without the stress typically associated with entertaining or holiday baking. The incredible versatility allows endless variations based on seasonal fruit, flavor preferences, or dietary needs, making this a valuable template rather than a single-use recipe. Whether you’re hosting a celebration, contributing to a potluck, treating your family to something special, or simply want comfort food dessert without complicated baking, this golden, bubbling, perfectly layered cake delivers nostalgic satisfaction, crowd-pleasing appeal, and bakery-quality results in every creamy, fruity, buttery spoonful.