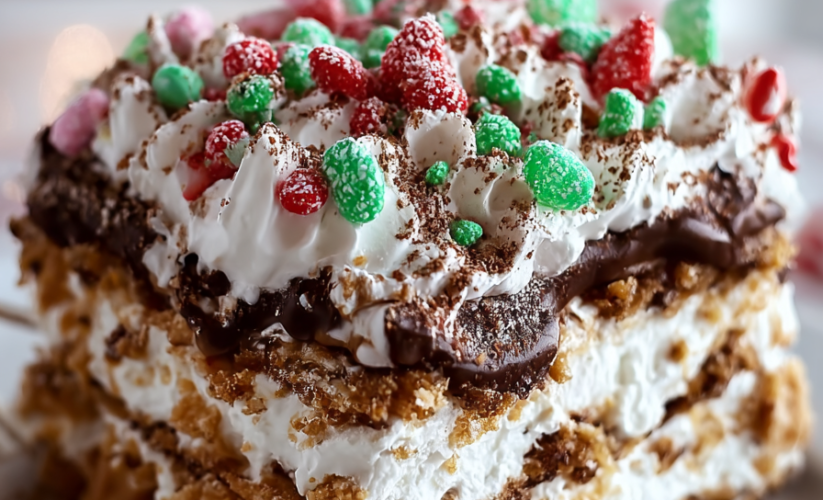
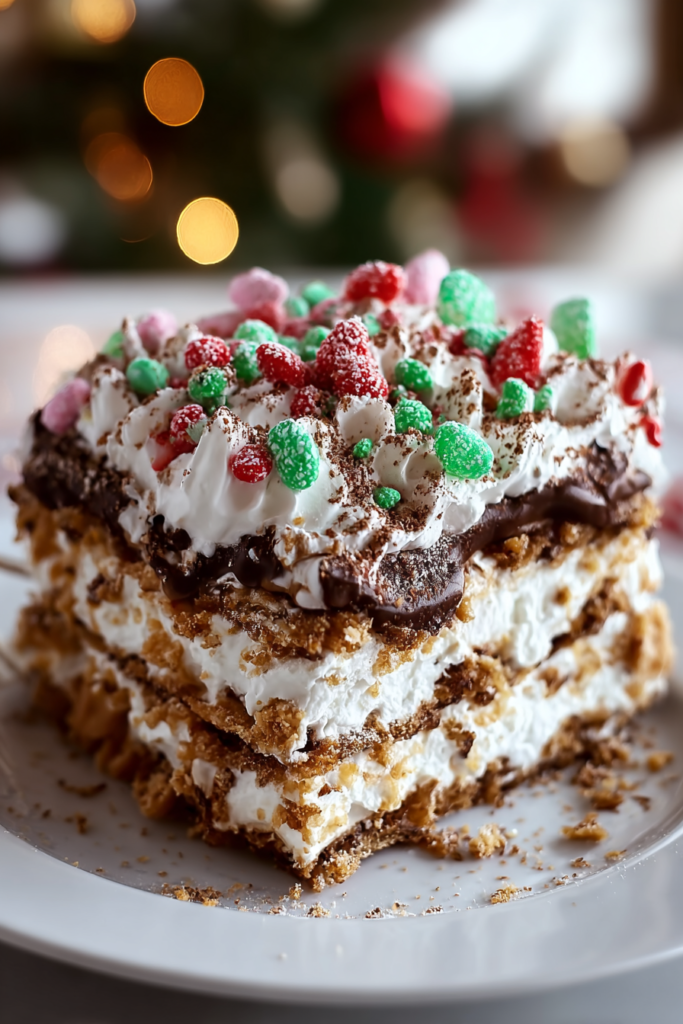
The Ultimate Christmas Cookie Lasagna
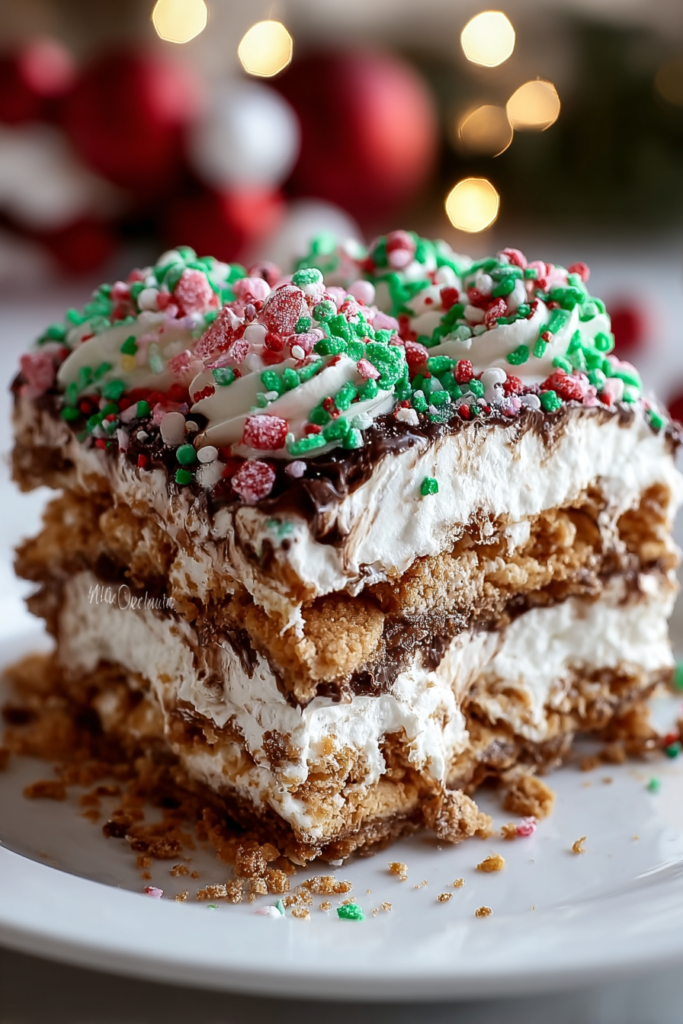
This festive, no-bake dessert transforms simple ingredients—Christmas Oreos, cream cheese, instant pudding, and whipped topping—into an impressive layered treat that captures the magic of holiday baking without requiring an oven. The recipe builds beautiful strata in a 9×13-inch dish: a crunchy cookie crust, silky cream cheese layer, smooth vanilla pudding studded with colorful sprinkles, and a cloud-like whipped topping garnished with crushed cookies and festive decorations. With its eye-catching presentation, make-ahead convenience, and crowd-pleasing flavors that appeal to all ages, this “lasagna” represents the perfect solution for holiday entertaining when oven space is precious and time is limited, yet you still want to serve something that looks and tastes like you spent hours creating edible Christmas magic.
Why You’ll Love This Recipe
- Zero Baking Required – This completely no-bake dessert keeps your kitchen cool and frees oven space for other holiday dishes while still delivering impressive, celebration-worthy results.
- Make-Ahead Excellence – Requiring at least 4 hours of chilling (ideally overnight), this dessert actually improves as it sits, allowing you to prepare days in advance and eliminate last-minute stress.
- Visually Stunning Presentation – The distinct layers visible when sliced, combined with festive red and green colors throughout, create Instagram-worthy presentation that impresses guests before they even take a bite.
- Crowd-Pleasing Flavors – The combination of chocolate cookies, sweet cream cheese, vanilla pudding, and whipped cream appeals universally, making this appropriate for mixed-age gatherings without challenging palates.
- Customizable for Any Holiday – While designed for Christmas with holiday Oreos and red-green sprinkles, this formula easily adapts to any celebration by changing cookie flavors and decoration colors.
- Feeds a Crowd Efficiently – The 9×13-inch pan yields 12-15 generous servings, making this ideal for parties, potlucks, or family gatherings without requiring multiple dessert preparations.
Ingredients You’ll Need
For the Cookie Crust
- 1 package Christmas Oreos (crushed) – Provides the crunchy, chocolate-flavored foundation; one standard package contains approximately 36 cookies, yielding about 3-4 cups crushed—use red and green filled holiday Oreos for festive appearance.
- 6 tbsp melted butter – Binds the cookie crumbs together, creating a cohesive crust that holds its shape when sliced; use unsalted butter to control sweetness.
For the Cream Cheese Layer
- 8 oz cream cheese, softened – Forms the rich, tangy middle layer; must be at room temperature for smooth mixing without lumps—remove from refrigerator 30-45 minutes before preparation.
- 1 cup powdered sugar – Sweetens the cream cheese layer while contributing to smooth, creamy texture; confectioners’ sugar dissolves more easily than granulated in this no-bake preparation.
- 2 cups whipped topping – Lightens the cream cheese mixture, creating a fluffy, mousse-like texture rather than dense cheesecake consistency; use Cool Whip or similar stabilized whipped topping.
For the Pudding Layer
- 2 boxes (3.4 oz each) instant vanilla pudding – Creates the smooth, sweet middle layer; instant pudding (not cook-and-serve) sets quickly without heat, making it ideal for no-bake desserts.
- 2 cups cold milk – Activates the instant pudding; use whole milk for richest flavor and creamiest texture, though 2% works adequately.
- 1 tsp vanilla extract – Enhances the vanilla pudding flavor; pure vanilla extract provides superior taste compared to imitation varieties.
- Red & green sprinkles – Adds festive holiday color and visual interest throughout the pudding layer; use jimmies (rod-shaped) or nonpareils (round) based on preference.
For the Final Topping
- 2 cups whipped topping – Creates the cloud-like finishing layer that mimics frosting; this separate portion ensures adequate coverage over the entire dessert.
- Crushed Christmas cookies – Provides textural contrast and reinforces the holiday theme; use additional Christmas Oreos or any festive cookies, crushed into small pieces.
- Extra festive sprinkles – Delivers the final decorative flourish; use red and green or any holiday-themed sprinkles to create a celebration-worthy appearance.
Step-by-Step Instructions
Create the Cookie Crust Foundation
Place the Christmas Oreos in a food processor and pulse until finely crushed, or place them in a sealed plastic bag and crush with a rolling pin until they form fine crumbs with some small chunks remaining for texture. Transfer the crushed cookies to a medium bowl and add the melted butter, stirring with a fork or spatula until all crumbs are evenly moistened and the mixture holds together when pressed. Press the cookie mixture firmly and evenly into the bottom of a 9×13-inch baking dish or pan, using the bottom of a measuring cup or glass to compact it thoroughly, ensuring no thin spots or gaps remain. Transfer the dish to the refrigerator and chill for 10 minutes to allow the crust to firm up while you prepare the next layer.
Prepare the Cream Cheese Layer
In a medium mixing bowl, combine the softened cream cheese and powdered sugar. Using an electric mixer on medium speed or vigorous manual beating with a wooden spoon, beat the mixture for 2-3 minutes until completely smooth, light, and fluffy with no visible lumps or sugar granules remaining. Add the 2 cups of whipped topping and fold it in gently using a spatula with sweeping motions from the bottom to the top, continuing until fully incorporated and the mixture is uniform in color and texture. Spread this cream cheese mixture evenly over the chilled cookie crust using an offset spatula or the back of a spoon, smoothing the top to create a level surface. Return to the refrigerator while preparing the pudding layer.
Mix the Festive Pudding Layer
In a separate medium bowl, combine the two boxes of instant vanilla pudding mix with the cold milk and vanilla extract. Whisk vigorously for 2 minutes until the mixture thickens noticeably and no dry pudding powder remains visible. The pudding should reach a consistency where it coats the back of a spoon but still flows smoothly. Immediately stir in the red and green sprinkles, distributing them evenly throughout the pudding to create colorful flecks. Quickly spread the pudding mixture over the cream cheese layer before it sets further, using a spatula to create an even layer that reaches all edges of the pan.
Add the Whipped Topping Finish
Spread the remaining 2 cups of whipped topping over the pudding layer, creating a smooth, even coating that covers the entire surface. Use gentle strokes with an offset spatula to avoid disturbing the pudding layer beneath. The whipped topping should create a cloud-like appearance reminiscent of fresh snow.
Garnish with Festive Decorations
Sprinkle the crushed Christmas cookies over the whipped topping layer, distributing them evenly across the surface. Add extra festive sprinkles generously, creating a colorful, celebration-worthy appearance that signals this is a special holiday dessert. You can create patterns, spell words, or simply scatter decorations randomly based on your artistic preference.
Chill Until Set
Cover the assembled dessert loosely with plastic wrap or aluminum foil, being careful not to let it touch the whipped topping surface (tent it slightly or use toothpicks to hold it away from the top). Transfer to the refrigerator and chill for at least 4 hours, though overnight chilling (8-12 hours) is ideal to allow all layers to set completely and flavors to meld together. The longer chilling period creates cleaner slices and better texture.
Slice and Serve
When ready to serve, remove the dessert from the refrigerator and use a sharp knife dipped in hot water (wipe clean between cuts) to slice into 12-15 squares. Use a spatula to carefully lift each piece from the pan, ensuring all layers remain intact. Serve chilled directly from the refrigerator for best texture and presentation.
Recipe Notes & Tips
- Cream Cheese Temperature Critical – Room temperature cream cheese is essential for smooth mixing; cold cream cheese creates lumps that won’t incorporate smoothly even with extensive beating.
- Cookie Crushing Consistency – Aim for fine crumbs with some small chunks remaining rather than powder; too-fine crushing creates dense, hard crust while large pieces prevent proper binding.
- Pudding Timing – Work quickly when spreading pudding as instant pudding begins setting immediately; if it becomes too thick before spreading, it won’t level smoothly and may tear the cream cheese layer beneath.
- Whipped Topping Folding – Fold gently when incorporating whipped topping into cream cheese to maintain airiness; vigorous stirring deflates the topping and creates dense rather than light, fluffy texture.
- Crust Firmness – Press the cookie crust firmly and evenly to create structure that holds together when sliced; loose, lightly pressed crust crumbles and falls apart.
- Advance Preparation – This dessert actually improves with time; prepare 1-2 days ahead for best results as layers firm and flavors develop complexity.
Nutritional Information
- Prep Time: 20 minutes (crushing cookies, mixing layers, assembling)
- Chilling Time: 4+ hours (minimum, overnight recommended)
- Total Time: 4 hours 20 minutes (plus overnight for optimal results)
- Servings: 12-15 servings (depending on portion size)
- Calories: Approximately 380-420 per serving based on 12 servings (estimated with standard ingredients)
Perfect Pairings
- Strong Coffee or Tea – Serve with robust black coffee, espresso, or Earl Grey tea whose slight bitterness balances the sweet, creamy dessert layers.
- Hot Chocolate – Offer rich hot chocolate garnished with whipped cream and mini marshmallows for an all-dessert experience that appeals to children and chocolate lovers.
- Fresh Berries – Accompany with fresh raspberries or strawberries on the side to add bright acidity and fresh fruit that cuts through the richness.
- Sparkling Water – Serve with sparkling water or flavored seltzer to cleanse the palate between bites of this sweet, rich dessert.
Ideal Occasions
- Christmas Celebrations – The festive red and green colors, holiday cookies, and impressive presentation make this the perfect centerpiece dessert for Christmas Eve, Christmas Day, or holiday parties.
- Potluck Contributions – The 9×13-inch pan travels well and serves many, making this ideal for bringing to gatherings, church suppers, or office parties during the holiday season.
- Cookie Exchange Parties – Serve at cookie swap events as a creative alternative to traditional cookies that showcases cookie flavors in unexpected format.
- New Year’s Celebrations – Adapt the colors and decorations for New Year’s Eve parties by using different sprinkle colors or adding gold accents for elegant presentation.
Storage & Serving Tips
- Refrigerator Storage – Store covered tightly in the refrigerator for up to 4-5 days; the dessert maintains texture and quality throughout this period as the layers remain stable.
- Freezer Storage – This dessert freezes well; wrap tightly in plastic wrap followed by aluminum foil and freeze for up to 2 months, then thaw overnight in the refrigerator before serving.
- Clean Slicing Technique – For the neatest slices, dip a sharp knife in hot water, wipe completely dry, then make one cut; repeat this process for each cut to prevent dragging layers.
- Advance Preparation – Prepare this dessert 1-3 days ahead of serving for optimal texture and convenience; the extended chilling creates firmer layers that slice more cleanly.
Creative Variations to Try
- Chocolate Lover’s Version – Replace vanilla pudding with chocolate pudding, use regular Oreos instead of Christmas varieties, and top with chocolate shavings for double-chocolate indulgence.
- Peppermint Holiday Twist – Add 1/2 teaspoon peppermint extract to the cream cheese layer, use crushed candy canes as topping, and incorporate chocolate pudding for peppermint-chocolate flavor.
- Cookies and Cream Theme – Use regular Oreos year-round, omit food coloring, and create elegant black-and-white presentation appropriate for any occasion beyond holidays.
- Strawberry Summer Version – Substitute strawberry pudding, use vanilla wafer or graham cracker crust, and top with fresh sliced strawberries for warm-weather adaptation.
Troubleshooting Common Issues
- Layers Sliding or Not Setting – Insufficient chilling time or too-warm serving temperature causes layers to slide; ensure full 4+ hours chilling and serve directly from refrigerator without sitting at room temperature.
- Watery, Loose Pudding Layer – Using warm milk or not whisking long enough prevents proper setting; ensure milk is cold and whisk vigorously for full 2 minutes until noticeably thick.
- Lumpy Cream Cheese Layer – Cold cream cheese or insufficient beating creates lumps; ensure cream cheese reaches room temperature and beat thoroughly until completely smooth before adding whipped topping.
- Crumbly, Falling-Apart Crust – Insufficient butter or not pressing firmly enough causes crumbling; ensure cookie crumbs are adequately moistened and press very firmly to compact and bind.
Why This Recipe Works
The Ultimate Christmas Cookie Lasagna succeeds through thoughtful layering of complementary textures and flavors that create visual impact alongside satisfying taste. The cookie crust provides crunchy contrast bound by melted butter that creates structure without baking. The cream cheese layer—sweetened with powdered sugar and lightened with whipped topping—creates a tangy, mousse-like middle that prevents the dessert from becoming one-dimensionally sweet. Instant pudding, specifically designed to set without heat through modified starches that thicken when hydrated, creates the smooth middle layer that binds upper and lower components together. The sprinkles throughout the pudding add visual interest and subtle textural variety. The final whipped topping layer provides cloud-like softness that mimics frosting while the cookie and sprinkle garnish signals celebration and holiday joy. Extended chilling allows all layers to firm properly and flavors to meld, creating cohesion that transforms individual components into a unified dessert. At approximately 380-420 calories per serving, this represents substantial indulgence where calories derive primarily from sugars (cookies, pudding, powdered sugar), fats (cream cheese, butter, whipped topping), and dairy—designed as a special-occasion celebration dessert reflecting the premium, indulgent nature of holiday treats meant for occasional enjoyment rather than everyday consumption.
Final Thoughts
The Ultimate Christmas Cookie Lasagna exemplifies modern holiday baking’s evolution toward convenience without sacrificing visual impact or celebratory spirit. This recipe appeals particularly to busy hosts managing multiple holiday commitments, those lacking oven space during peak cooking seasons, or anyone seeking impressive desserts that don’t require professional pastry skills. The “lasagna” designation cleverly references the layered structure while the festive name and decoration clearly signal this as celebration food designed to create joy and wonder. The no-bake nature removes barriers of temperature management, timing precision, and baking anxiety that prevent many from attempting homemade holiday desserts. The make-ahead requirement transforms from limitation to advantage, allowing preparation during calm moments rather than chaotic day-of cooking. While the 380-420 calorie estimate per serving represents significant indulgence, the holiday context and special-occasion nature appropriately frame this as celebratory treat rather than everyday dessert, with the understanding that holidays are precisely when such indulgences create memories and traditions. For those seeking lighter versions, consider using reduced-fat cream cheese, sugar-free pudding, and light whipped topping; though these modifications will alter both texture and flavor that define the “ultimate” designation. Ultimately, this recipe deserves a permanent place in holiday collections as proof that impressive, beautiful, delicious desserts needn’t require advanced skills, extensive time, or oven access—sometimes the best celebrations come from simple ingredients, thoughtful layering, and the understanding that presentation, color, and festive spirit create magic just as surely as elaborate techniques ever could.