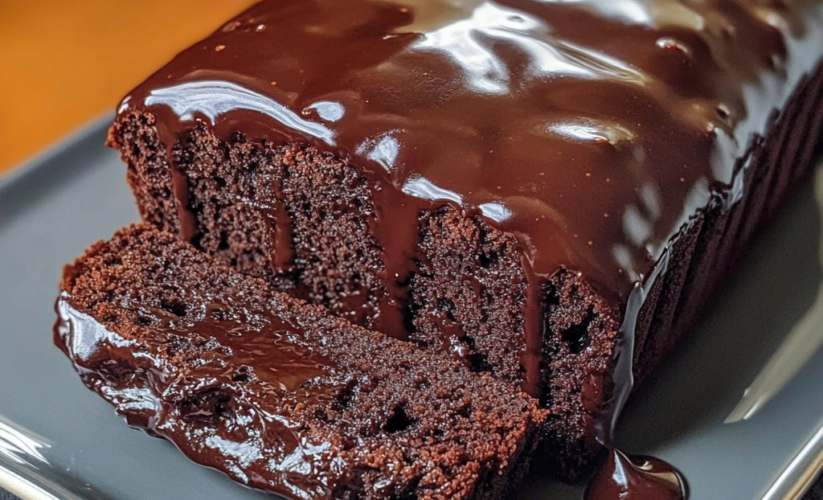
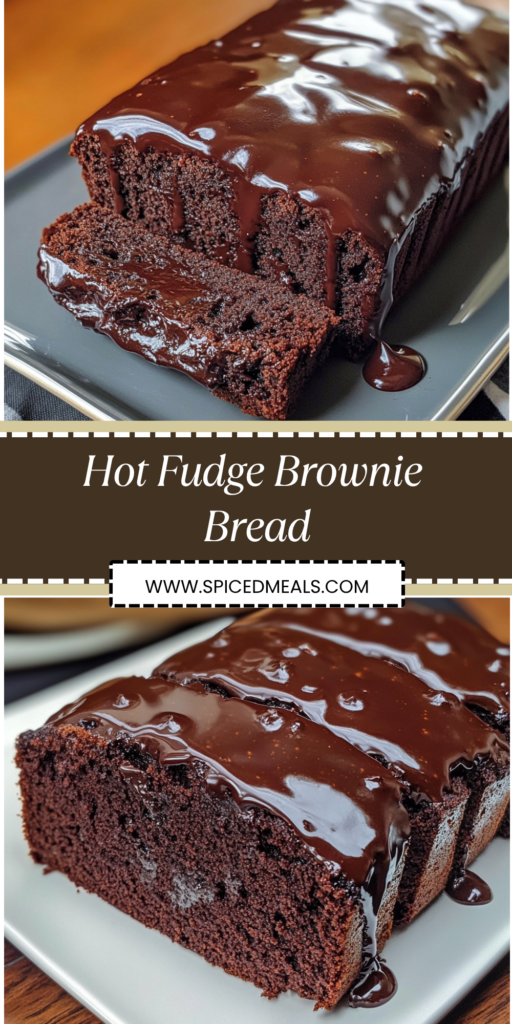
Hot Fudge Brownie Bread
This is the dessert that breaks all the rules—a decadent collision between fudgy brownies and quick bread that creates something so intensely chocolatey, it should come with a warning label. Imagine the dense, moist crumb of banana bread merged with the rich, gooey center of underbaked brownies, then swirled with ribbons of hot fudge that create pockets of molten chocolate in every slice. It’s the kind of dangerous creation that has people cutting “just a sliver” until half the loaf mysteriously disappears.
Ingredients
For the Brownie Bread:
- 1¾ cups all-purpose flour
- ¾ cup unsweetened cocoa powder (Dutch-processed preferred)
- 1 teaspoon baking soda
- ½ teaspoon baking powder
- ¾ teaspoon salt
- ½ teaspoon espresso powder
- ½ cup unsalted butter, melted and cooled slightly
- ½ cup vegetable oil
- 1¼ cups granulated sugar
- ½ cup packed brown sugar
- 3 large eggs, room temperature
- 1 teaspoon vanilla extract
- ¾ cup buttermilk, room temperature
- ½ cup hot water or hot coffee
- 1 cup chocolate chips (semi-sweet or dark)
For the Hot Fudge Swirl:
- ½ cup heavy cream
- ½ cup dark chocolate chips
- 2 tablespoons butter
- 2 tablespoons corn syrup
- ¼ teaspoon salt
- ½ teaspoon vanilla extract
For the Chocolate Glaze (Optional):
- 4 ounces dark chocolate, chopped
- ½ cup heavy cream
- 1 tablespoon butter
- Pinch of salt
Instructions
- Prepare for Chocolate Paradise: Preheat oven to 350°F. Grease a 9×5 inch loaf pan, line with parchment paper leaving overhang for easy removal. The double insurance prevents sticking of this ultra-fudgy bread.
- Make Hot Fudge Swirl: In small saucepan, heat cream until just steaming. Remove from heat, add chocolate chips, butter, corn syrup, and salt. Let sit 2 minutes, then whisk until glossy and smooth. Stir in vanilla. Set aside to cool slightly—it should be pourable but not hot.
- Combine Dry Ingredients: In large bowl, sift together flour, cocoa powder, baking soda, baking powder, salt, and espresso powder. Sifting prevents cocoa lumps and ensures even distribution. The espresso powder intensifies chocolate flavor without adding coffee taste.
- Mix Wet Ingredients: In another bowl, whisk melted butter, oil, both sugars until combined. Add eggs one at a time, beating well after each. The mixture should be glossy and smooth. Stir in vanilla extract.
- Create the Batter: Add dry ingredients to wet in three additions, alternating with buttermilk (dry-wet-dry-wet-dry). Mix just until combined after each addition. The batter will be thick.
- Add Hot Liquid: Stir in hot water or coffee until smooth. The batter will thin dramatically—this is correct. The hot liquid helps cocoa bloom and creates the fudgy texture. Fold in chocolate chips.
- Layer and Swirl: Pour half the batter into prepared pan. Drizzle with half the hot fudge sauce, then use knife to create swirls. Add remaining batter, then remaining fudge. Create figure-8 patterns with knife for beautiful marbling.
- Bake to Perfection: Bake 65-75 minutes until toothpick inserted in center comes out with just a few moist crumbs. The top should spring back lightly when touched. If top browns too quickly, tent with foil after 50 minutes.
- Cool Properly: Cool in pan 20 minutes—the structure needs time to set. Use parchment overhang to lift out, then cool completely on wire rack. This prevents soggy bottom while maintaining moist interior.
- Optional Glaze: For extra decadence, heat cream until steaming, pour over chopped chocolate. Let sit 2 minutes, add butter and salt, whisk until glossy. Pour over cooled bread, allowing drips down sides.
Recipe Notes
- Prep Time: 25 minutes
- Bake Time: 65-75 minutes
- Cooling Time: 2 hours
- Total Time: 3 hours 30 minutes
- Servings: 10-12 slices
- Calories: 485 per slice (with glaze)
The Science of Ultimate Chocolate Intensity
This recipe achieves its incredible chocolate depth through multiple forms of cocoa and strategic ingredient interactions. Dutch-processed cocoa provides mellow, deep chocolate flavor with reduced acidity, creating a darker color and richer taste than natural cocoa. Combined with melted chocolate in the chips and fudge swirl, we’re layering chocolate flavors at different intensities.
The hot liquid addition serves crucial purposes beyond just mixing. Hot water or coffee “blooms” the cocoa, releasing volatile flavor compounds that would otherwise remain locked. This technique, borrowed from professional pastry kitchens, dramatically intensifies chocolate flavor. The heat also partially melts the cocoa butter in the powder, contributing to the fudgy texture.
That combination of melted butter AND oil isn’t redundancy—it’s texture engineering. Butter provides flavor and helps with structure, while oil ensures moisture that lasts for days. Oil coats flour proteins more effectively than butter, limiting gluten development for tender crumb. This dual-fat approach creates the perfect balance between structure and moistness.
Understanding the Brownie-Bread Hybrid
Traditional quick breads rely on chemical leavening and minimal mixing for tender crumb. Brownies use similar principles but with different ratios—more fat and sugar, less flour. This recipe splits the difference, creating something entirely new: the structure to slice cleanly like bread with the fudgy density of brownies.
The sugar amount seems excessive until you understand its role beyond sweetness. Sugar interferes with gluten formation, ensuring tenderness. It also holds moisture, contributing to the fudgy texture. The combination of granulated and brown sugar adds complexity—granulated for structure and sweetness, brown for moisture and subtle molasses notes.
Buttermilk’s acidity serves multiple functions. It reacts with baking soda for lift, tenderizes gluten for soft crumb, and adds tangy notes that balance the intense sweetness. No buttermilk? Make your own with 3/4 cup milk plus 2 teaspoons vinegar, let stand 5 minutes.
The Hot Fudge Innovation
The hot fudge swirl transforms this from great to extraordinary. Unlike simple chocolate chips that maintain their shape, this sauce creates rivers of gooey chocolate throughout. The corn syrup prevents crystallization, keeping the fudge smooth even after baking. It also lowers the freezing point, ensuring pockets stay molten longer.
Swirling technique affects both appearance and taste distribution. Over-swirling creates muddy appearance and uniform flavor. Under-swirling leaves distinct layers that may separate. The figure-8 pattern creates beautiful marbling while ensuring fudge appears in every slice. Insert knife fully to bottom for swirls throughout, not just on top.
The fudge must cool slightly before adding—too hot and it sinks to bottom; too cool and it won’t incorporate properly. Ideal temperature is warm but not steaming, with pourable consistency. This temperature balance ensures even distribution throughout the batter.
Temperature and Timing Precision
That wide baking time range (65-75 minutes) accounts for variables: oven accuracy, pan material, and desired fudginess. Dark pans conduct heat better, reducing time by 5-10 minutes. Glass pans may need extra time. The goal is set edges with slightly underdone center that continues cooking from residual heat.
The toothpick test requires interpretation. Unlike cakes that need clean toothpicks, this should have moist crumbs clinging. Completely clean means overbaked and dry; wet batter means underdone. Those few clinging crumbs indicate perfect fudgy texture that sets properly as it cools.
Starting at 350°F creates proper crust while cooking interior evenly. Higher temperatures would burn the sugary exterior before cooking through. Lower wouldn’t create the slight crust that provides textural contrast. If your oven runs hot, reduce to 340°F and extend time slightly.
The Cooling Countdown
That 20-minute pan cooling isn’t arbitrary—it’s crucial for structural integrity. The starches need time to set while the chocolate components firm up. Moving too early causes collapse and breaking. Too long in the pan creates soggy bottom from trapped steam.
The parchment paper overhang eliminates the terrifying moment of inverting a fragile loaf. Simply lift straight up, maintaining the perfect top crust. This method also prevents the bottom from becoming too dark from extended pan contact.
Complete cooling before slicing requires patience but ensures clean cuts. Warm bread compresses and smears, creating messy slices. For neat portions, cool completely, then use sharp knife dipped in hot water and wiped between cuts. The hot knife melts through chocolate cleanly.
Customization and Variations
Triple Chocolate: Add white chocolate chips with the semi-sweet for contrast. Drizzle with white chocolate glaze for stunning presentation.
Nutty Delight: Fold in 1 cup toasted walnuts or pecans. Their crunch contrasts beautifully with fudgy texture. Toast nuts first for maximum flavor.
Espresso Brownie Bread: Use strong coffee instead of water, increase espresso powder to 1 tablespoon. Creates mocha flavor that enhances rather than dominates chocolate.
Peanut Butter Swirl: Replace half the hot fudge with peanut butter sauce (½ cup peanut butter melted with 2 tablespoons cream). Classic combination in new format.
Mint Chocolate: Add 1 teaspoon peppermint extract to batter, use mint chocolate chips. Perfect for holidays or mint lovers.
Raspberry Ripple: Swirl ½ cup raspberry preserves with the fudge. The fruit’s acidity cuts through richness beautifully.
Storage and Serving Strategies
Proper storage maintains the fudgy texture. Wrap tightly in plastic wrap, then foil, store at room temperature up to 4 days. The double wrapping prevents moisture loss that would compromise texture. Refrigeration extends life to a week but may firm texture slightly.
For optimal serving, bring refrigerated slices to room temperature. Or microwave individual slices 10-15 seconds to restore fresh-baked warmth and activate those fudge pockets. Slightly warm showcases the textural contrasts best.
This bread freezes exceptionally well. Wrap individual slices in plastic, then place in freezer bag. Frozen up to 3 months. Thaw at room temperature or microwave frozen slices 30-45 seconds. The high fat and sugar content prevents freezer damage.
Serving Suggestions and Pairings
While spectacular alone, strategic pairings elevate the experience. Vanilla ice cream provides temperature and flavor contrast. The cold cream melts into warm bread creating impromptu sauce. Whipped cream offers lighter contrast to dense bread.
For elegant plating, dust with powdered sugar, add fresh berries for color and acidity. A raspberry coulis provides sophisticated touch and palate-cleansing tartness. Candied orange peel adds textural interest and citrus notes that complement chocolate.
Coffee pairing is essential—the bitterness balances sweetness while echoing chocolate notes. Espresso or strong black coffee works best. For wine lovers, port or full-bodied red wine like Zinfandel complements the intensity. Milk seems obvious but genuinely enhances the experience.
Troubleshooting Common Issues
“My bread sank in the middle”: Usually from underbaking or too much leavening. Ensure accurate measurements and proper oven temperature. The center should spring back lightly when touched.
“It’s dry and crumbly”: Overbaked or incorrect measurements. Reduce time by 5 minutes next attempt. Ensure you’re not packing flour when measuring—spoon and level for accuracy.
“Fudge swirl disappeared”: Fudge too hot when added or over-mixed. Cool fudge properly and swirl gently. The ribbons should remain distinct for visual and textural interest.
“Top cracked severely”: Normal for quick breads but excessive cracking indicates oven too hot. Reduce temperature 10 degrees. Some cracking adds rustic charm—embrace it.
“Can’t taste the chocolate”: Use high-quality cocoa powder and chocolate. Dutched cocoa provides more intense flavor than natural. Don’t skip espresso powder—it amplifies chocolate without adding coffee taste.
The Make-Ahead Advantage
This bread improves with time as flavors meld and moisture redistributes. Day-old slices often surpass fresh for this reason. Make 2 days ahead for optimal flavor development, adding glaze day of serving for fresh appearance.
For events, bake multiple loaves and freeze. The recipe doubles easily—use two pans rather than one large for even baking. Having frozen loaves provides instant dessert for unexpected guests or chocolate emergencies.
Components can be staged: measure dry ingredients night before, prepare fudge sauce ahead and reheat gently. This breakdown makes morning baking manageable, perfect for weekend breakfast treats or gift giving.
The Economics of Decadence
Despite its luxurious taste, this bread costs under $8 to make—less than a single bakery brownie in many areas. The ingredients are pantry staples except for chocolate, making it accessible luxury. One loaf serves 10-12, making per-serving cost remarkably reasonable.
Quality ingredients make noticeable difference here. Splurge on good cocoa powder and chocolate—they’re the stars. Valrhona, Ghirardelli, or Callebaut create professional results. The minimal extra cost translates to exponentially better flavor.
Final Thoughts
This Hot Fudge Brownie Bread represents the best of American baking innovation—taking two beloved treats and creating something even better than either alone. It satisfies those intense chocolate cravings while providing the satisfaction of homemade bread. The combination of simple techniques and quality ingredients creates a dessert that seems far more complex than its straightforward preparation suggests. Master this recipe and you’ll have a secret weapon for everything from casual coffee dates to show-stopping dinner party finales. It’s proof that sometimes the best recipes come from breaking the rules and seeing what delicious chaos ensues.