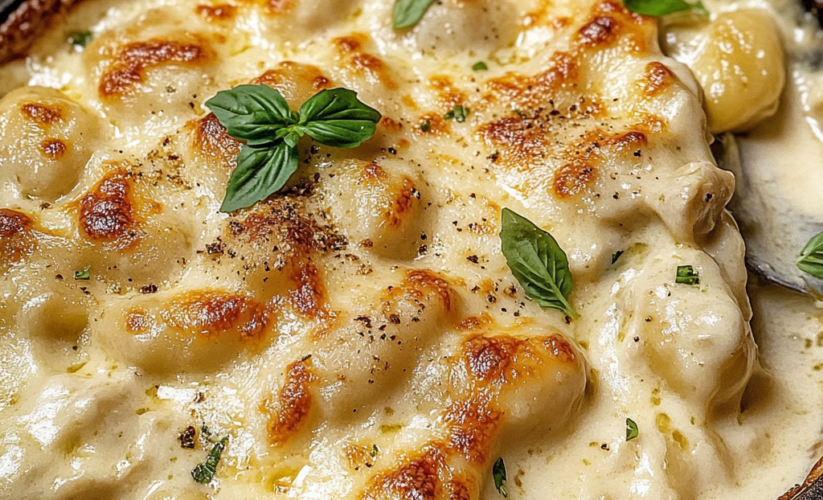
Creamy Chicken Alfredo Gnocchi Bake
When you’re craving the ultimate comfort food, this Creamy Chicken Alfredo Gnocchi Bake delivers in every way. It combines pillowy soft gnocchi with tender chicken and a homemade Alfredo sauce, all baked until golden and bubbly. This dish has become my family’s most requested dinner, converting even the pickiest eaters into gnocchi enthusiasts!
Why You’ll Love This Recipe
This isn’t your average pasta bake – it’s a luxurious combination of tender potato gnocchi, creamy homemade Alfredo sauce, and perfectly seasoned chicken. The entire dish is topped with melty cheese and baked until golden brown. It’s easy enough for weeknights but special enough for company.
Ingredients & Equipment
For the Gnocchi and Chicken:
- 2 lbs potato gnocchi
- 2 large chicken breasts, diced
- 2 tablespoons olive oil
- 1 teaspoon Italian seasoning
- Salt and pepper to taste
For the Alfredo Sauce:
- 4 tablespoons butter
- 4 cloves garlic, minced
- 2 cups heavy cream
- 2 cups freshly grated Parmesan cheese
- 1/2 cup cream cheese, softened
- 1/4 teaspoon nutmeg
- Salt and black pepper to taste
For Topping:
- 1 cup shredded mozzarella
- 1/2 cup grated Parmesan
- Fresh parsley for garnish
Equipment Needed:
- 9×13 inch baking dish
- Large skillet
- Large pot for gnocchi
- Whisk
- Colander
- Grater
- Measuring cups and spoons
Step-by-Step Instructions
- Prep Phase (10 minutes)
- Preheat oven to 375°F
- Dice chicken into bite-sized pieces
- Grate cheeses
- Mince garlic
- Cook the Chicken (10 minutes)
- Heat olive oil in skillet
- Season chicken with Italian seasoning, salt, and pepper
- Cook until golden and done
- Remove to plate and set aside
- Make Alfredo Sauce (15 minutes)
- Melt butter in same skillet
- Sauté garlic until fragrant
- Add cream and bring to simmer
- Whisk in Parmesan and cream cheese
- Season with nutmeg, salt, and pepper
- Simmer until thickened
- Cook Gnocchi (5 minutes)
- Boil water in large pot
- Cook gnocchi until they float
- Drain but don’t rinse
- Assemble and Bake (30 minutes)
- Combine gnocchi, chicken, and sauce
- Transfer to baking dish
- Top with mozzarella and Parmesan
- Bake 20-25 minutes until bubbly
- Broil 2-3 minutes for golden top
Pro Tips for Success
- Don’t overcook the gnocchi – they’ll continue cooking in the oven
- Use freshly grated Parmesan for best sauce texture
- Let cream cheese come to room temperature
- Season each component for best flavor
- Let rest 5-10 minutes before serving
Variations & Add-ins
Protein Options:
- Rotisserie chicken
- Italian sausage
- Shrimp
- Mushrooms for vegetarian version
Vegetable Add-ins:
- Spinach
- Roasted broccoli
- Sun-dried tomatoes
- Sautéed mushrooms
- Peas
Sauce Variations:
- Add white wine
- Mix in pesto
- Spice it up with red pepper flakes
- Add roasted garlic
Make-Ahead & Storage
Make-Ahead Options:
- Prepare components separately
- Assemble up to 24 hours ahead
- Add extra sauce if making ahead
Storage:
- Refrigerate up to 4 days
- Freeze up to 3 months
- Thaw overnight in refrigerator
Reheating:
- Cover with foil and heat at 350°F
- Add splash of cream when reheating
- Individual portions can be microwaved
Troubleshooting Guide
Problem: Sauce Too Thick
- Add warm cream or pasta water
- Don’t overheat when reheating
- Stir gently when combining
Problem: Gnocchi Too Soft
- Don’t overcook initially
- Cook until just floating
- Don’t let sit in water
Problem: Sauce Separating
- Use room temperature cream cheese
- Simmer gently
- Don’t overheat when reheating
FAQs
Can I use store-bought Alfredo sauce?
Yes, but homemade tastes better. Use about 4 cups.
Can I use dried gnocchi?
Yes, they’re actually preferred for this recipe.
How do I know when it’s done?
Edges should be bubbly and top golden brown.
Can I make this gluten-free?
Yes, use gluten-free gnocchi and check all other ingredients.
This Creamy Chicken Alfredo Gnocchi Bake is the ultimate comfort food mashup. The key to success lies in not overcooking the gnocchi and making a smooth, creamy sauce. Once you master this basic version, feel free to experiment with different add-ins to make it your own. Remember to let it rest for a few minutes after baking – it’ll be worth the wait!